I have recently been experimenting with making felt. My son made a beautiful custom table, and we thought a handmade piece of felt would be a nice touch.
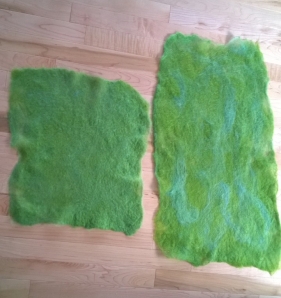
Here’s a picture of my second attempt at wet felting. The piece on the left can easily yield a 10X12 piece for the drawer lining.
I was amazed at how much I love these pieces of felt. The pictures cannot convey how light, soft and airy they feel. Now I want to make felted clothing! Why did I think felt had to feel “itchy”?
My first attempt at wet felting resulted in a nice piece of felt, but it was too thick. Also, it was a bit uneven. I’ll definitely find a creative use for that piece of felt. But here I’ll describe my second attempt that produced the felt shown above.
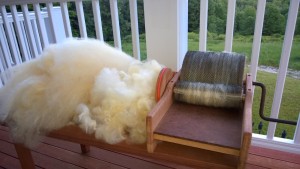
The most time was definitely spend on fiber preparation. My fleece was especially dirty. It had quite a few sticks and plant matter and many second cuts. I teased it by hand over newspaper to catch the dirt. Teasing is just pulling it apart and starting to fluff the fibers. Ok, I may have told it a joke or two.
After teasing, I ran some fiber through the drum carder. I also experimented with handcarding and combing first. I’m really not sure what I prefer. All seem to require about the same amount of work.
I tried dyeing some of the wool after carding, and decided I prefer to dye it first, then tease and card it. I used a dye that is suitable for animal fibers and followed the directions from the dye manufacturer.
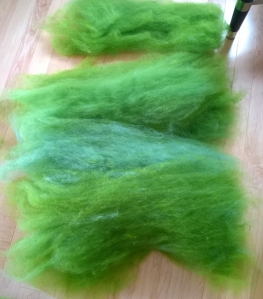
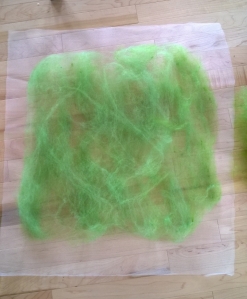
Dyeing turned out to be very easy. I bought a pot to use just for that purpose in case any of the dyes weren’t safe to eat. I dried the newly died wool on a towel. As mentioned earlier, I then carded the wool. Here’s what it looked like. You can see some variation in the color where some fleece looks blue. That’s where I was “exhausting” the dye bath. I like the effect.
Next I cut a couple of pieces of netting and started laying out my first layer of fiber. I pulled the fiber out into a very thin layer on top of the netting. It is important to put the next layer with the fabrics aligned at a 90 degree angle. Repeat this process as many times as you want. For this thin felt, I used only three layers.
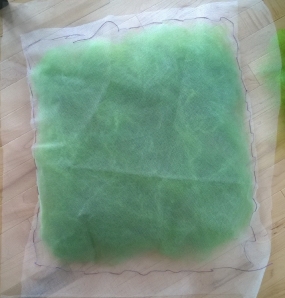
With all my layers added, I put a top piece of netting over the fiber and did a quick basting around the edges so that I had a little packet ready to felt. As you can see, I’m not going to get a seamstress award. I used a plastic needle and cotton warp yarn to loosely secure the netting. You’ll pull this out when you are done. Don’t use wool yarn for the basting or it will become a design element in your felt!
Finally, it’s time to do the felting.
I mixed soap flakes and water into a plastic bottle. I put approximately 1/2 cup of flakes to 2 cups of hot water into a container and mixed well.
Now, I’m going outside because I know I’m going to create a mess.
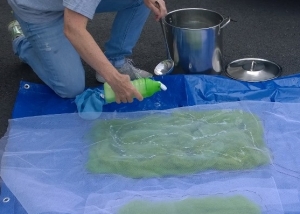
First I put down a big tarp in the driveway.
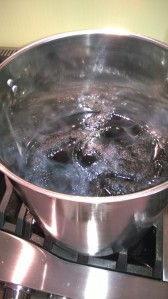
Next, I heated a big pot of water in my dye pot, found a ladle and took the pot of hot water out to the driveway.
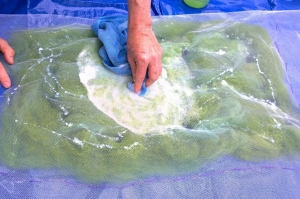
I laid my nice little packet on the tarp and drizzled my soapy mixture over the wool. Not too much, just a few swirls.
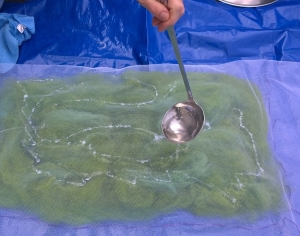
Taking ladles of hot water, I sprinkled over the packet to start to wet the wool. I did not worry about soaking it thoroughly. In fact, too much water will interfere with the felting.
Starting in the middle, I GENTLY started rubbing with a circular motion. The water was too hot for me at first so I used a rag until it cooled a bit. I continued to rub in circular motions the fingers of both hands. As the wool started to feel more like felt, you can increase the pressure somewhat, but be careful not to create holes in the felt by moving the fibers too much. This sliding action of the fibers against each other works to felt, not so much the pressure of the rubbing.
Continue this for at least 30 minutes. I flipped the packet over after I had the fibers totally wetted and rubbed down to a dense mass, continuing to rub in circular motions.
Once I was tired of doing this, I tested it a little by poking my fingers into the packet to see how much it was holding together. Happy with the results, I started the “fulling” process.
I rolled the fiber packet in bubble wrap, pressing and rolling repeatedly. I would occasionally rotate the fiber pack to do the compression from multiple direction.
For the smaller felted item, I started with approximately. 19 X 16 inches of fibers, and after felting had a piece measuring 16 X 13 inches.
I plan to sell some started “kits” soon on www.scarlettpines.etsy.com

